How to install the VESA plate on the Beovision 7-40 stand
Mount a VESA bracket on the Beovision 7 40 stand for a new TV – the VESA plate is ready for mounting Neo 7 Adapter
See also how a VESA plate is installed on a Beovision 7-32 stand
Remove the old B&O TV and prepare for the VESA bracket
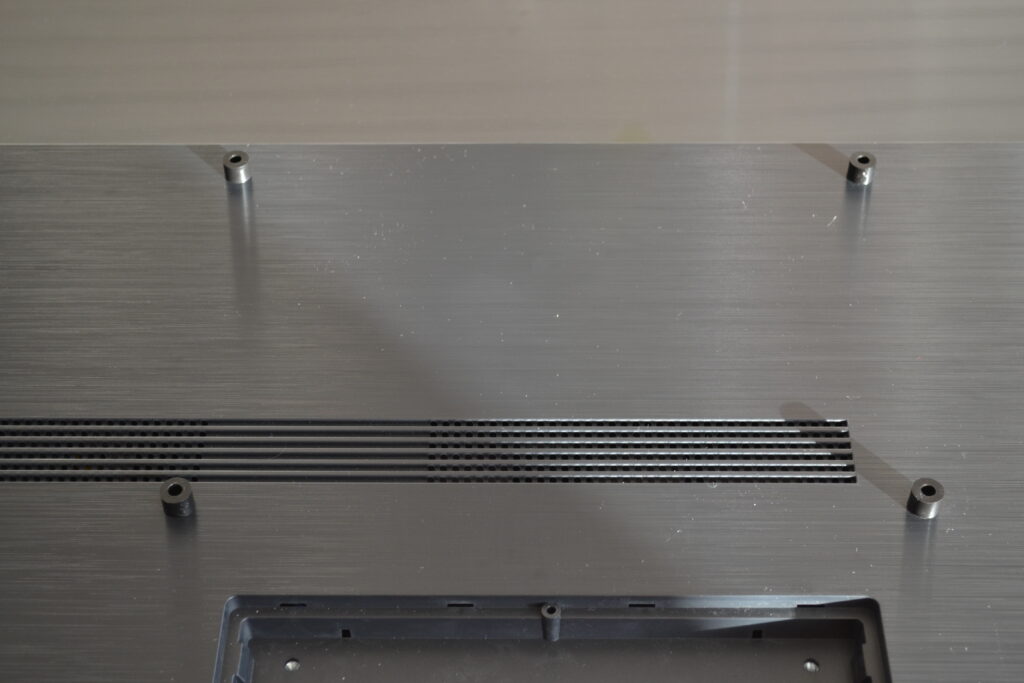
Start by removing the Beovision TV from the stand. This is done by loosening two screws at the back of the stand - save these screws as they will be used again to mount the VESA plate
Be careful when removing the B&O TV as it is very heavy. It is important to have at least 2 people to lift the TV off the stand.
Now you have to mount the VESA bracket on your new TV from LG, Samsung, Sony, Loewe, Panasonic or Philips or whichever manufacturer you choose.
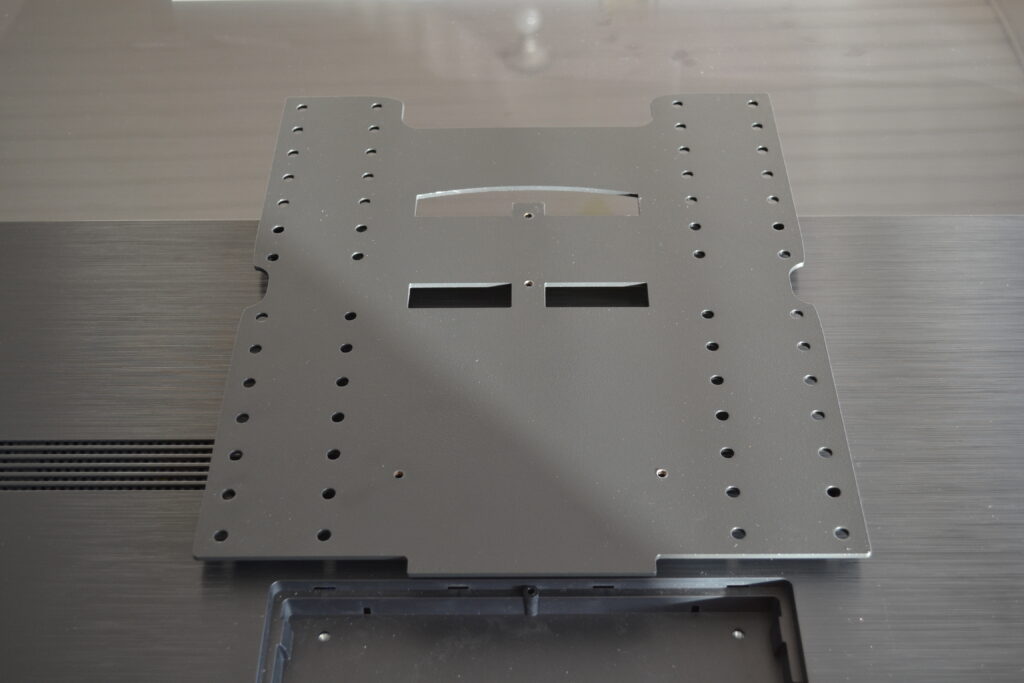
Get ready to mount the VESA adapter.
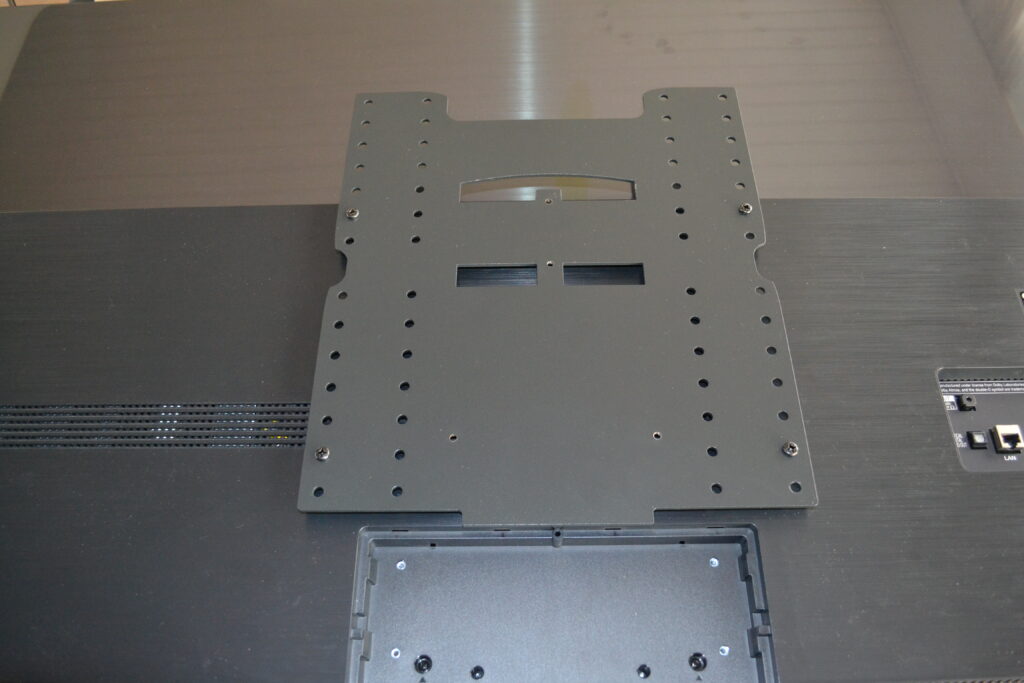
Along with the VESA plate, a plastic bag was delivered with 4 black spacers, 4 black screws and finally 2 black screws (smaller screws than the 4).
When the screen is securely placed on the table, you must start by laying out the 4 black spacers on the TV. Place them over the holes so they are ready for the screws.
VESA adapter is attached to your new TV
Then place the VESA bracket carefully on top of the 4 black spacers - without moving them.
If you are in doubt about which holes should be used, read the section at the bottom of this page before mounting the VESA plate. The section tells you how to measure the location.
Be very careful with the screen of your new TV - it is very easy to scratch the screen. Even a small grain of sand on the table will make a scratch, which can subsequently be seen with the naked eye. You must therefore have a surface between the screen and the table. It is recommended to use the exact material that the screen was wrapped in when you took it out of the box. Brush and shake this material free of dust and dirt so that it can be placed on the table before placing the screen on the table.
Neomesteren has no responsibility for the assembly or any scratches in the screen during assembly.
The VESA plate is attached with screws
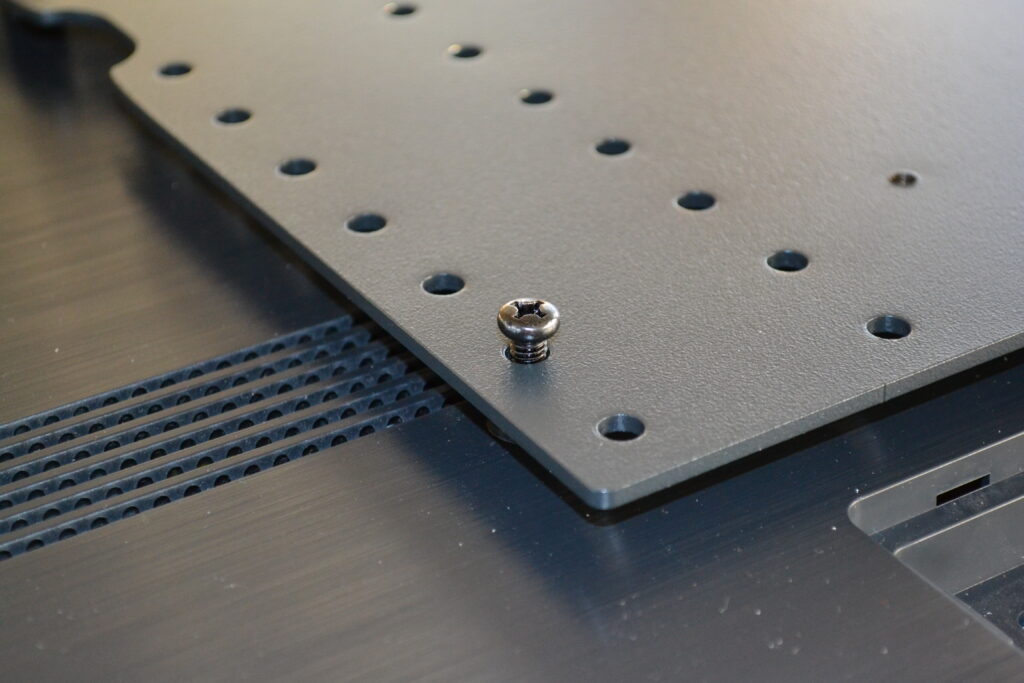
Now fit the 4 black screws by hand so that they are loose. You can therefore slightly adjust the plate until all the screws are fitted.
Now tighten the 4 screws with a screwdriver. The screwdriver must not be used, as it can damage the VESA bracket and the holes in the TV.
Be careful when mounting the TV with VESA adapter on the B&O stand - it is best to have at least 2 people to mount the TV. The TV must be tilted slightly to get the plate over the corresponding device on the stand.
Install the 2 screws that you removed when you disassembled the B&O TV. Tighten the screws with a screwdriver.
also read “How to install Neo 7 the adapter”
VESA bracket - choose the right holes
The VESA plate from Neo Mesteren contains many holes so that it fits different TVs and different TV brands.
There is of course free choice, but the following guideline can be a guide.
The distance between the Beolab 7 speaker / soundbar and the B&O TV is 2-3 centimeters - this is how it was originally designed.
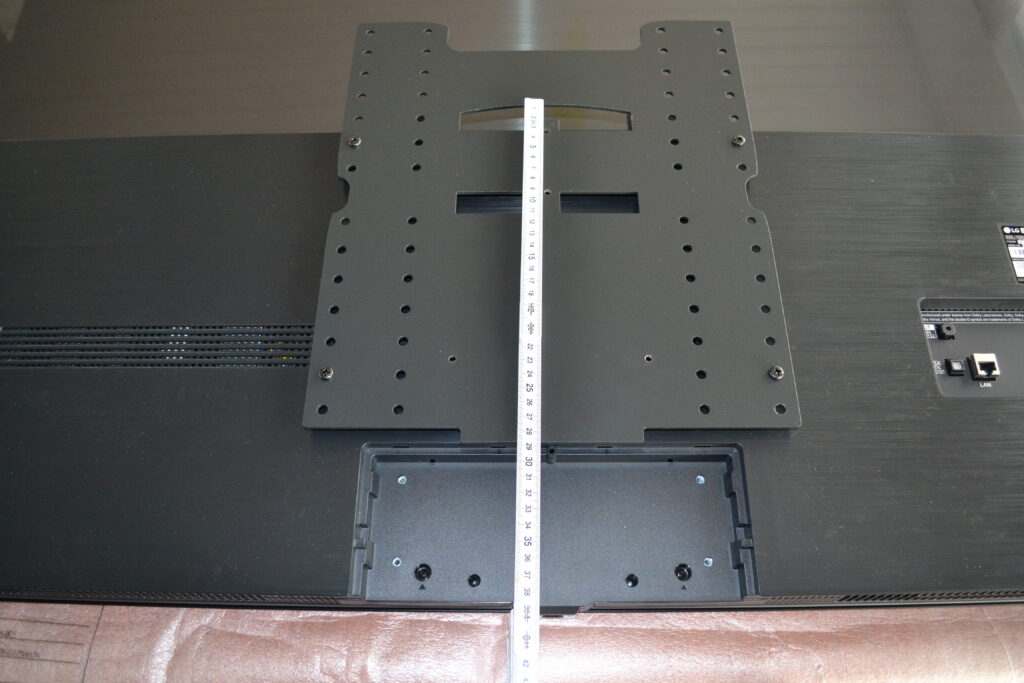
The distance from the VESA bracket to the upper arch (shown in the picture above) and to the bottom of the TV must be approximately 38-39 centimeters.
Measure it before tightening the VESA plate.
In the picture above, an LG 55″ TV is mounted, with other sizes of TV, the screws will not necessarily sit in the same holes as shown in the picture above.