User manual for Neo Convert (R1 – Release 1)
User manual for the product Neo Convert (R1) together with a new TV from LG, Samsung, Philips, Panasonic, Sony or Loewe and a B&O remote control.
Introduction
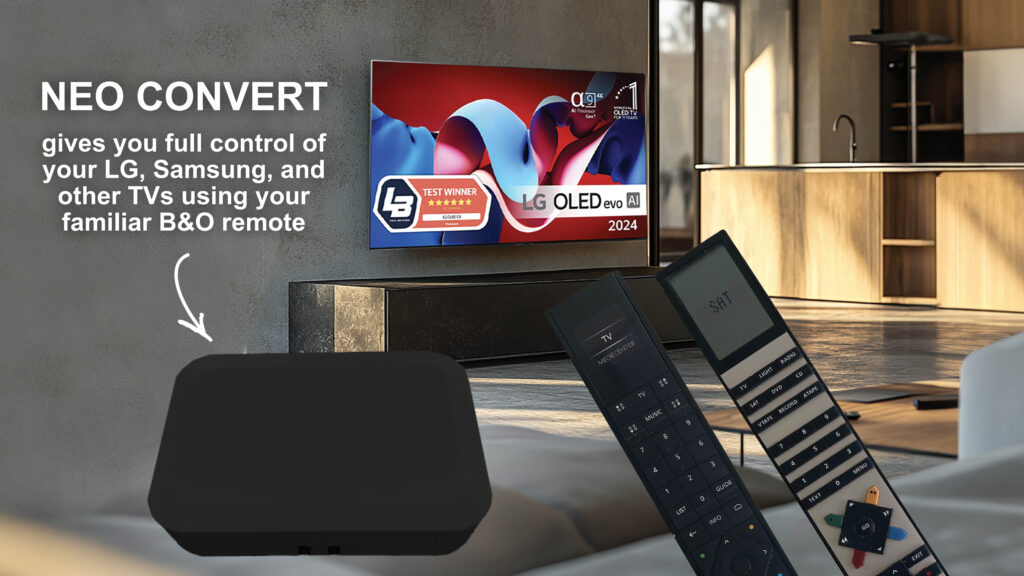
Neo Convert gives you the opportunity to control TVs from well-known brands such as LG, Samsung, Sony, Philips, Loewe and Panasonic with a Bang & Olufsen remote control
Neo Convert combines the best of two worlds. Keep your current TV with all its technological advantages, and at the same time enjoy the delicious integration with a B&O remote control that gives you control and aesthetics in a special class
Safety
In order to comply with safety and not cause any damage to physical products or people, the following must be respected.
- Check immediately that the packaging is not damaged and Neo Convert is not damaged. Do not use the product if it is damaged. Contact your supplier.
- Dispose of the packaging in accordance with the applicable regulations where you live.
- Use only the supplied AC/DC supply
- Use only approved cables
- Do not insert objects other than approved cables into plugs and holes
- Do not disassemble the product or modify the product.
- Do not subject the product to strong shocks or vibrations
- Stop using the product if you see smoke or experience a strange smell from the product
- Do not use organic solvents such as alcohol, benzine or paint thinner to clean the product.
- Do not wet the product with any means.
- Periodically remove dust from the product with a dry cloth.
- Do not wrap the product in fabric or adhesive so that the product cannot receive fresh air.
- Do not insert your fingers into open connectors or other openings in the product
Environmental considerations
If Neo Convert is no longer functional or is no longer to be used, it must be disposed of in a responsible manner. Hand it in for recycling in your municipality so that the product's parts can be recycled or destroyed properly.
Product description
With Neo Convert you can operate your new TV with a B&O remote control, which ensures a uniform and exclusive experience throughout the home.
So if you value design and user experience from Bang & Olufsen, but are satisfied with your current TV, er Neo Convert the perfect solution. Experience what it feels like to turn your TV into a genuine Bang & Olufsen device – without compromising.
Neo Convert combines the best of two worlds – advanced TV technology and the intuitive B&O user experience.
Simply plug in the included power supply and IR cable and you're ready to go.
With your B&O remote control, such as Beo4 or Beoremote One, you can control your TV in all its menus and adjust the volume – all with the well-known and comfortable Bang & Olufsen experience.
The experience with Neo Convert is that you get a Bang & Olufsen TV, where you can use your B&O remote control as if you bought a new B&O TV for the kitchen, living room, bedroom or other rooms in the house.
Contents of the package
Before you start installing the product, check that the package contains a Neo Convert, an IR cable and a 12V power supply.

Preparations of the product

Insert the cables
First fit the supplied IR cable - insert the cable into the B&O IR connector.
The cable has an IR receiver at the end of the cable. The receiver can be placed appropriately in relation to the B&O remote control, so that optimal reception is achieved.
Connect the supplied power supply to the plug "Power".
IR operation
Controlling your TV is done with IR (Infra Red) commands. An IR signal is sent from your Bang & Olufsen remote control to Neo Convert. The command is forwarded from Neo Convert to your TV. The function i Neo Convert is like Google Translate – understanding the language of a B&O remote control (eg a Beo4, Beoremote One) and translating it into the language your TV understands (eg a TV from LG, Samsung, Philips, Sony, Panasonic, Loewe).
IR (Infra Red) is light, so it requires to Neo Convert sees this light either directly or via reflections from the wall, ceiling or furniture. Note here that the IR cable has an IR receiver at the end of the cable, which understands B&O language. Try to place the IR receiver so that there is a direct line of sight between the B&O remote control and the IR receiver.
Neo Convert can be placed where you want it. It could be behind your TV, in a TV cabinet, on the shelf or many other locations.
The most important thing is that the B&O IR receiver (at the end of the cable) has direct aim at your B&O remote control. In addition, must Neo Convert could send an IR signal to your TV.
Do not save Neo Convert behind metal, in a metal cabinet or behind a lot of wires
On Neo Convert the box also contains 2 green IR transmitter diodes, which send an IR signal to your TV. They must not shine visibly to the eye. A human cannot see IR signals.

Configuration of Neo Convert before use
Do not connect the included power supply before the B&O IR cable is mounted.
Neo Convert is developed to fit several TV brands. The following brands can be used
| Number | Make | Remark |
|---|---|---|
| 101 | LG | In operation |
| 102 | Samsung (see also no. 110) | In operation |
| 103 | Philips | In operation |
| 104 | Sony | In operation |
| 105 | Loewe (We See, Bild C and Bild I) | In operation |
| 106 | Panasonic | In operation |
| 107 | Sharp | Planned |
| 108 | Hisense | Planned |
| 109 | Loewe (Image 1,2,3,V,S) | In operation |
| 110 | Samsung The Frame | In operation |

Neo Convert must be brought into setup mode. This is done by setting “Switch” in position B.
Position B is only used for setup. During normal operation, "Switch” stand in position A.
Set "Switch” in position B and select your TV make, as described below.
Remember to put "Switch” back to position A when you want to operate your TV.

MENU 1XXX GO
You must replace the 3 pieces XXX with the number in the table above. For example, if you want to set up for LG TV with number 101, you must do the following
1101 MENU GO
When the setup is done, the setup is saved automatically. If the setup went well, two short beeps will be heard. If you hear a long BEEP, the setup did not go well and you need to redo it.
Set "Switch” back in position A.

Daily use af Neo Convert with B&O remote control
The B&O remote control
It is possible to use Beo4 in version MkI or MkII or MkIII or a Beo4 Navi. The operation is slightly different with these remote controls than the Beoremote One, which can also be used.
Other B&O remote controls such as Beolink 1000, Beolink 5000, Beolink 7000, Beo5 and Beo6 can also be used, although with limited functionality.
It is recommended that the reader download manuals for B&O remote controls directly from the B&O website and read them thoroughly before use. In what follows, it is assumed that users understand the setup and daily use of B&O remote controls.
LG operation
| TV | Beo4 | Beo4 Navi | Remote One | LG Remote |
|---|---|---|---|---|
| Turn on the TV | TV | TV | TV | Standby button |
| Turn off the TV | Standby button | Standby button | Standby button | Standby button |
| Channel change on TV – up | Yellow button | Yellow button | P+ | Channel - up arrow |
| Channel change on TV – down | Blue button | Blue button | P- | Channel - down arrow |
| TV Guide (EPG) | Green button | Green button | Guide | Guide |
| Home Menu | Menu | Menu | Menu | Home |
| Input | DTV/SAT | DTV | My Choice 1 | Input |
| Settings | Red button or LIST + Format | Red button or LIST + Format | MitValg 2 or LIST + Format | Settings |
| Back in a menu | Stop | Stop | Back | Back |
| Exit out of all menus | Exit | Back | Exit | |
| Mute the sound | Volume up/down | Volume up/down | Volume up/down | Mute |
Samsung operation
| TV | Beo4 | Beo4 Navi | BeoRemote One | samsung remote |
|---|---|---|---|---|
| Turn on the TV | Standby button | Standby button | Standby button | Standby button |
| Turn off the TV | Standby button | Standby button | Standby button | Standby button |
| Channel change on TV – up | Yellow button | Yellow button | P+ | Channel - up arrow |
| Channel change on TV – down | Blue button | Blue button | P- | Channel - down arrow |
| TV Guide (EPG) | Green button | Green button | Guide | Guide |
| Home Menu | Menu | Menu | Menu | Home |
| Input | DTV/SAT | DTV | MyBottom 1 | Input |
| Settings | Red button LIST + Format | Red button LIST + Format | MyBottom 2 LIST + Format | Settings |
| Back in a menu | Stop | Stop | Back | Back |
| Exit out of all menus | Exit | Back | Exit | |
| Mute the sound | Volume up/down | Volume up/down | Volume up/down | Mute |
Philips operation
| TV | Beo4 | Beo4 Navi | BeoRemote One | Philips Remote |
|---|---|---|---|---|
| Turn on the TV | TV / Standby button | TV / Standby button | TV / Standby button | Standby/On button |
| Turn off the TV | Standby button | Standby button | Standby button | Standby/On button |
| Channel change on TV – up | Yellow button | Yellow button | P+ | Channel - up arrow |
| Channel change on TV – down | Blue button | Blue button | P- | Channel - down arrow |
| TV Guide (EPG) | Green button | Green button | Guide | TV Guide |
| Start Menu | Menu | Menu | Menu | Home |
| Sources | DTV / SAT | DTV | MyButton1 | Sources |
| Quick menu | Red button | Red button | MyButton 2 | Menu |
| Frequent Settings | LIST + Format | LIST + Format | LIST + Format | |
| Back in a menu | Stop | Stop | Back | Back |
| Exit out of all menus | Exit | Back | Exit | |
| Mute the sound | Volume up/down | Volume up/down | Volume up/down | Mute |
Sony operation
| TV | Beo4 | Beo4 Navi | Remote One | Sony Remote |
|---|---|---|---|---|
| Turn on the TV | TV / Standby button | TV / Standby button | TV / Standby button | On/Standby button |
| Turn off the TV | Standby button | Standby button | Standby button | On/Standby button |
| Channel change on TV – up | Yellow button | Yellow button | P+ | Prog - up arrow |
| Channel change on TV – down | Blue button | Blue button | P- | Prog - down arrow |
| TV Guide (EPG) | Green button | Green button | Guide | Guide |
| Show Home Menu | Menu | Menu | Menu | Home |
| Input selector | DTV/SAT | DTV | MyBottom 1 | Input select |
| Quick Setup | Red button or LIST + Format | Red Button or Red Button | MyBottom 2 or MyBottom 2 | Quick Setup |
| Back in a menu | Stop | Stop | Back | Return/Back |
| Exit out of all menus | Exit | Back | Exit | Exit |
| Mute the sound | Volume up/down | Volume up/down | Volume up/down | Mute |
Panasonic operation
| TV | Beo4 | Beo4 Navi | Remote One | Panasonic Remote |
|---|---|---|---|---|
| Turn on the TV | Standby button | Standby button | Standby button | Standby button |
| Turn off the TV | Standby button | Standby button | Standby button | Standby button |
| Channel change on TV – up | Yellow button | Yellow button | P+ | Channel - up arrow |
| Channel change on TV – down | Blue button | Blue button | P- | Channel - down arrow |
| TV Guide (EPG) | Green button | Green button | Guide | Guide |
| Home Menu | Menu | Menu | Menu | Home |
| Input Selection | DTV/SAT | DTV | MyBottom 1 | Input – AV |
| Main menu | Red button | Red button | MyBottom 2 | Menu |
| Option | LIST + Format | LIST + Format | LIST + Format | Option |
| Back in a menu | Stop | Stop | Back | Back |
| Exit out of all menus | Exit | Back | Exit | |
| Mute the sound | Volume up/down | Volume up/down | Volume up/down | Mute |
Technical help
If a technical problem occurs with Neo Convert you must remedy the error before contacting the place of purchase.
You can also read more on the NeoMesteren website - www.neomesteren.dk
If the product is in a state where the product no longer responds to the remote control, you can try the following
Step 1
Cut off the power to the product by unplugging the power supply from the socket or taking 5V (Power) the cord out of the product. Wait 5 seconds and reconnect the power. If this does not help, go to point 2
Step 2
You can reset the product - back to its original setting. This is done by pressing a command on the remote control.
Note that you must then set up the product again - see above in the manual.
The action is equivalent to making a CTRL-ALT-Delete on a Windows computer - i.e. a restart. There must be put "Switch” in position B first.
- 9998 MENU GO.
It will reset all settings on Neo Convert
Remember to update the software so that the latest new version is installed.
Step 3
Last possible to bring Neo Convert back to life is shown here.
It is a brutal way and is equivalent to formatting the hard drive on a Windows computer and re-installing everything. Everything is lost and it has to be installed again. Only do it as a last resort. Remember to install the latest software again.
Remove the 5V wire (Power) from Neo Convert. Wait 10 seconds.
Press and hold the Reset button on the product.
(Use the end of a pen or pencil or similar. Press carefully so you don't damage the small push button inside the product)
Now connect the power simultaneous by holding down the Reset button.
You will subsequently hear 4 short beeps as a response that it went well.

If none of the above options work, contact us Neomesteren – we make an exchange within the warranty or make a repair.
Updating the software on Neo Convert
Neo Convert box in release 1 (R1) software can be updated. It requires you to connect Neo Convert for Internettet with a network cable in the plug "Internet"
Do you need to update the software on Neo Convert, then read here, how it is performed